Depending on feature set which you want use in the new Microsoft Azure Portal it can happen that some of them are available is different hosting plan than your one.
For example you might want to enable monitoring in the portal as shown at the picture below:
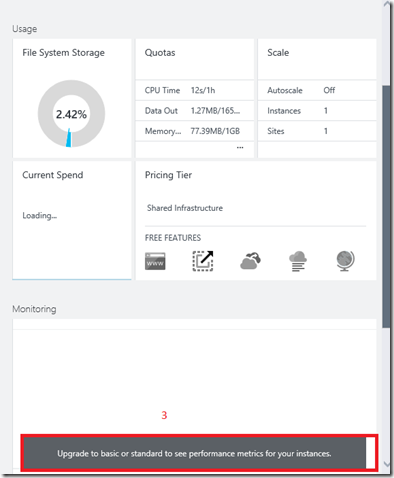
Unfortunately this is not allowed in this case. To make this possible you will have to change “Web Hosting Plan”.
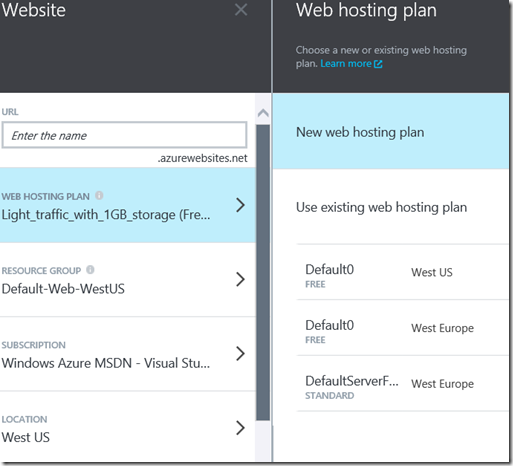
Usually when you create the WebSite you will have to create/select the Web Hosting Plan as shown on the picture below:
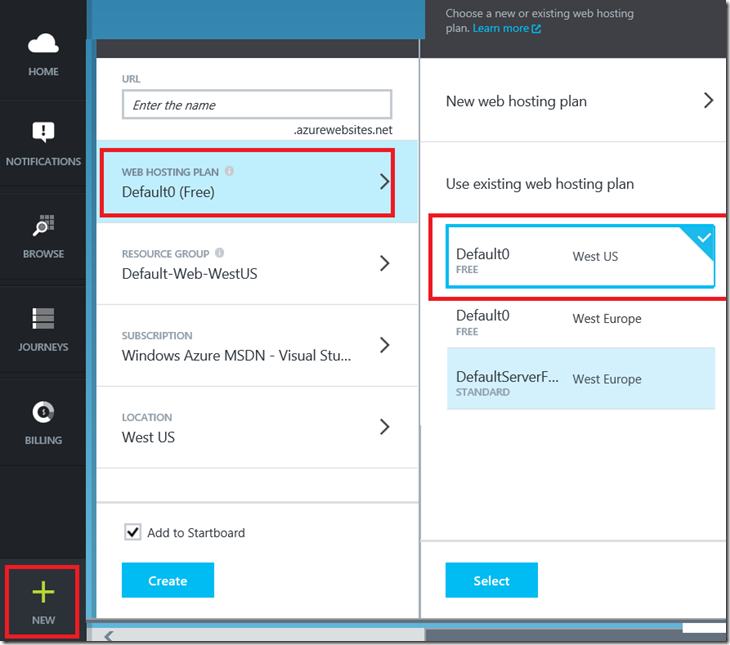
However when selecting the plan you will have to exactly know what the plans defines behind its name.
If you have created your web site with previous portal you will have no plan what the plan is.
For this reason it is recommended to create the new plan. To do this click on ”New web hosting plan” as shown on the previous picture.
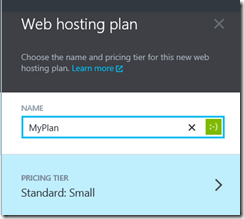
Enter some name (no whitespaces & Co.) and choose one of following plans:
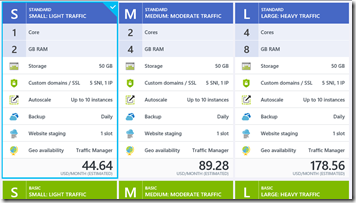
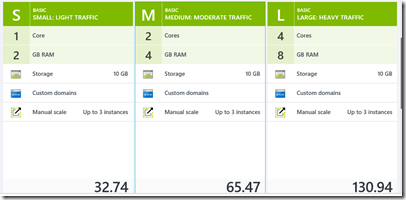
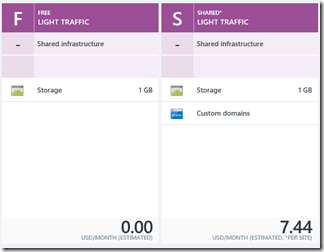
I created the “Light_traffic_with_1GB_storage” plan:
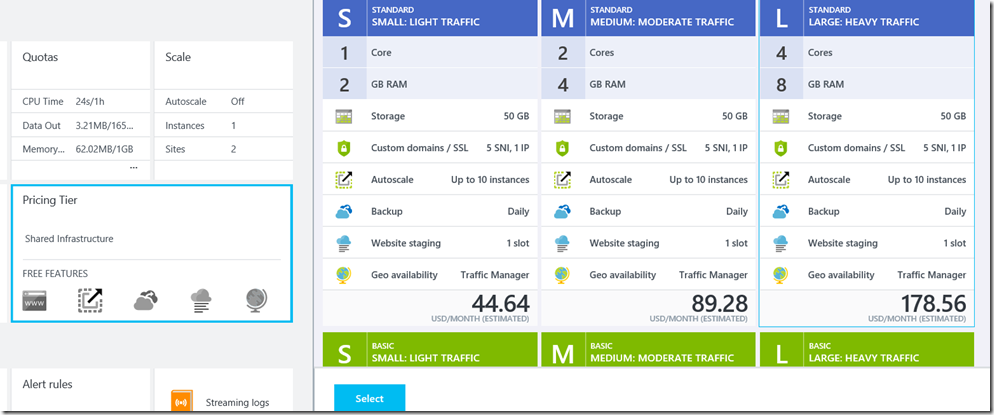
If you want to change you web hosting plan browse for your web site and select it. Then navigate to “Pricing Tier”.
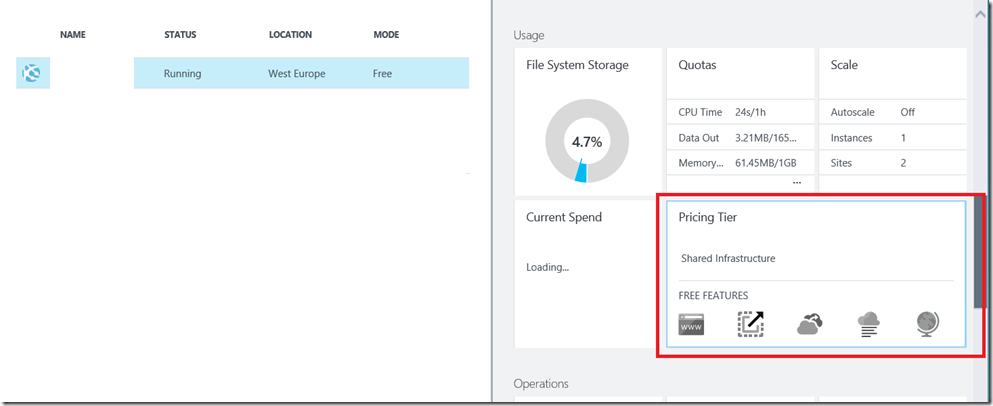
After that all plans appear and you can select one.
Posted
Apr 22 2014, 06:21 PM
by
Damir Dobric