1. Open the project properties and select “Publish”. Following dialog appears:
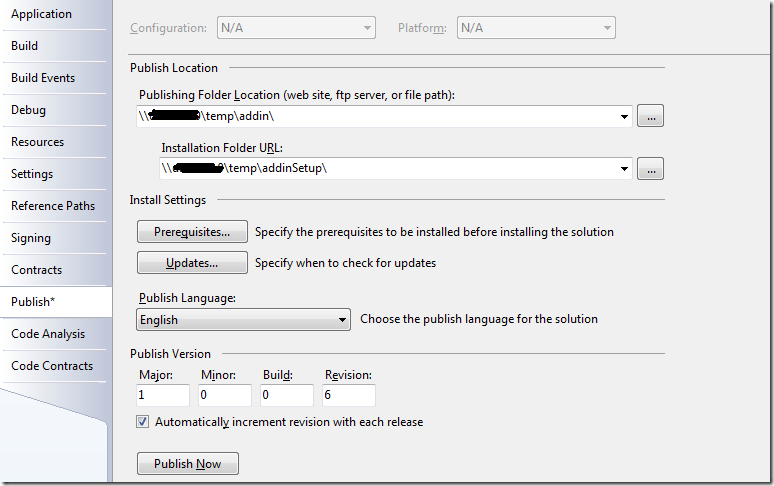
Here you have to choose the name of directory where published files will be copied.
More interesting is the “Installation Folder”. This is the location from where your addin should be installed. At same later point of time when outlook decides to download new version of addin, the download will be performed from this folder.
For this reason, after publishing is finished, open the “Publish Folder” and copy all files from that folder to folder “Installation Folder”.
2. You can optionally select what certificate will be used for signing of manifest.

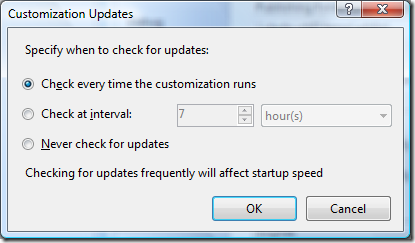
3. In “Publish” dialog click on button “Updates”. Here you can choose when updates will be performed.
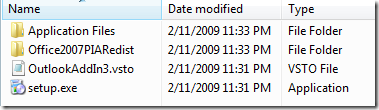
4. Click “Publish Now” and following files will be created:
5. Now, open the “Publishing Folder” and copy all files from that folder to folder “Installation Folder”. Note that users who wants to install the AddIn should have an access to the “Install Folder”. Note also, that this folder should be a trusted location.
6. When you start Outlook, you should make sure that you your AddIn is installed.
7. Now you can create a new version of AddIn and publish it again. Note that after this step you will not be able to install the AddIn, because publishing process implicitly start the build which will confuse AddIn-loader and Click Once mechanism.
To work around this issue you can simply use another machine for testing. I know this will probably not satisfy you. Fortunately there is another way how to do this.
When you have published Version V1, copy all of published files in some Folder. For example Folder_V1. Then delete all content from the "Publishing Folder". Now build and publish the version V2. Analog, copy all of files from "Publishing Folder" to some folder Folder_V2.
Uninstall the current version of AddIn, which is now V2.
To install the version V1 follow step 5 and start outlook. Close Outlook, delete all files from folder “Installation Folder” and copy all files from Folder_V2 to “Installation Folder”.
Start Outlook and you will see that AddIn is updated.(Assuming that “check every time the customization runs” is selected”). If this option is not selected, you will have to wait 7 days to update AddIn, which is default setting :)
Hope this helps you...
Posted
Feb 12 2009, 12:01 AM
by
Damir Dobric